Simple Utility to Calculate File Hashes
16 May 2014 • by Bob • Scripting, Visual Studio, Scripting, Visual Studio
I have to download various files from time-to-time, and it's nice when websites provide checksum hashes so I can validate that the file I just downloaded matches the version on the server. (ON a related note, I wrote a blog several years ago which showed how to create a provider for the IIS FTP service which automatically creates checksum files when files are uploaded to a server; see my Automatically Creating Checksum Files for FTP Uploads blog post for the details.)
In order to calculate hashes for files that I have downloaded, several years ago I wrote a simple command-line application for Windows which uses several of the built-in algorithms in .NET's System.Security.Cryptography. And while I realize that there are probably other tools that provide this same functionality, I have used this little utility for years, and I've had several people ask me for copies. With that in mind, I thought that it might make a nice blog topic if I shared the code with everyone. (Note: It's a really simple sample; the .NET framework does all the real work for this application.)
Without further fanfare, here's the source code. In order to use this code sample, you need to create a new C# project in Visual Studio and choose the Console Application template. When the new project opens, replace the template's code with the following:
using System;
using System.Collections.Generic;
using System.IO;
using System.Text;
using System.Security.Cryptography;

class Hash
{
    static void Main(string[] args)
    {
        // Verify the correct number of command-line arguments.
        if (args.Length != 2)
        {
            // Show the help message if an incorrect number of arguments was specified.
            ShowHelp();
            return;
        }
        else
        {
            byte[] hashValue = null;
            // Verify that the specified file exists.
            if (!File.Exists(args[1]))
            {
                // Show the help message if a non-existent filename was specified.
                ShowHelp();
                return;
            }
            else
            {
                try
                {
                    // Create a fileStream for the file.
                    FileStream fileStream = File.OpenRead(args[1]);
                    // Be sure it's positioned to the beginning of the stream.
                    fileStream.Position = 0;
                    // Use the specified hash algorithm.
                    switch (args[0].ToUpper())
                    {
                        case "MD5":
                            // Compute the MD5 hash of the fileStream.
                            hashValue = MD5.Create().ComputeHash(fileStream);
                            break;
                        case "SHA1":
                            // Compute the SHA1 hash of the fileStream.
                            hashValue = SHA1.Create().ComputeHash(fileStream);
                            break;
                        case "SHA256":
                            // Compute the SHA256 hash of the fileStream.
                            hashValue = SHA256.Create().ComputeHash(fileStream);
                            break;
                        case "SHA384":
                            // Compute the SHA384 hash of the fileStream.
                            hashValue = SHA384.Create().ComputeHash(fileStream);
                            break;
                        case "SHA512":
                            // Compute the SHA512 hash of the fileStream.
                            hashValue = SHA512.Create().ComputeHash(fileStream);
                            break;
                        case "BASE64":
                            // Compute the BASE64 hash of the fileStream.
                            byte[] binaryData = new Byte[fileStream.Length];
                            long bytesRead = fileStream.Read(binaryData, 0, (int)fileStream.Length);
                            if (bytesRead != fileStream.Length)
                            {
                                throw new Exception(String.Format("Number of bytes read ({0}) does not match file size ({1}).", bytesRead, fileStream.Length));
                            }
                            string base64String = System.Convert.ToBase64String(binaryData, 0, binaryData.Length);
                            Console.WriteLine("File: {0}\r\nBASE64 Hash: {1}", fileStream.Name, base64String);
                            hashValue = null;
                            break;
                        default:
                            // Display the help message if an unrecognized hash algorithm was specified.
                            ShowHelp();
                            return;
                    }
                    if (hashValue != null)
                    {
                        // Write the hash value to the Console.
                        PrintHashData(args[0].ToUpper(), fileStream.Name, hashValue);
                    }
                    // Close the file.
                    fileStream.Close();
                }
                catch (Exception ex)
                {
                    Console.WriteLine("Error: {0}", ex.Message);
                }
            }
        }
    }

    // Display the help message.
    private static void ShowHelp()
    {/>        Console.WriteLine("HASH.exe <hash algorithm> <file name>\n\n" +
            "\tWhere <hash algorithm> is one of the following:\n" +
            "\t\tBASE64\n\t\tMD5\n\t\tSHA1\n\t\tSHA256\n\t\tSHA384\n\t\tSHA512\n");
    }

    // Print the hash data in a readable format.
    private static void PrintHashData(string algorithm, string fileName, byte[] array)
    {
        Console.Write("File: {0}\r\n{1} Hash: ", fileName,algorithm);
        for (int i = 0; i < array.Length; i++)
        {
            Console.Write(String.Format("{0:X2}", array[i]));
        }
        Console.WriteLine();
    }/>}
When you compile and run the application, you will see following help message when you specify no command-line parameters:
HASH.exe <hash algorithm> <file name>

    Where <hash algorithm> is one of the following:
        BASE64
        MD5
        SHA1
        SHA256
        SHA384
        SHA512
When you specify one of the supported hashing algorithms and a filename, the application will display something like the following example:
C:\>hash.exe SHA1 foobar.zip
File: C:\foobar.zip
SHA1 Hash: 57686F6120447564652C20426F6220526F636B73
That's all there is to it. As I mentioned earlier, it's a pretty simple sample. ;-]
Note: This blog was originally posted at http://blogs.msdn.com/robert_mcmurray/
How to trust the IIS Express Self-Signed Certificate
15 November 2013 • by Bob • SSL, IIS Express, WebMatrix, Visual Studio, Internet Explorer
I had an interesting question from a coworker today that I thought would make a great blog. Here's the scenario...
Problem Description
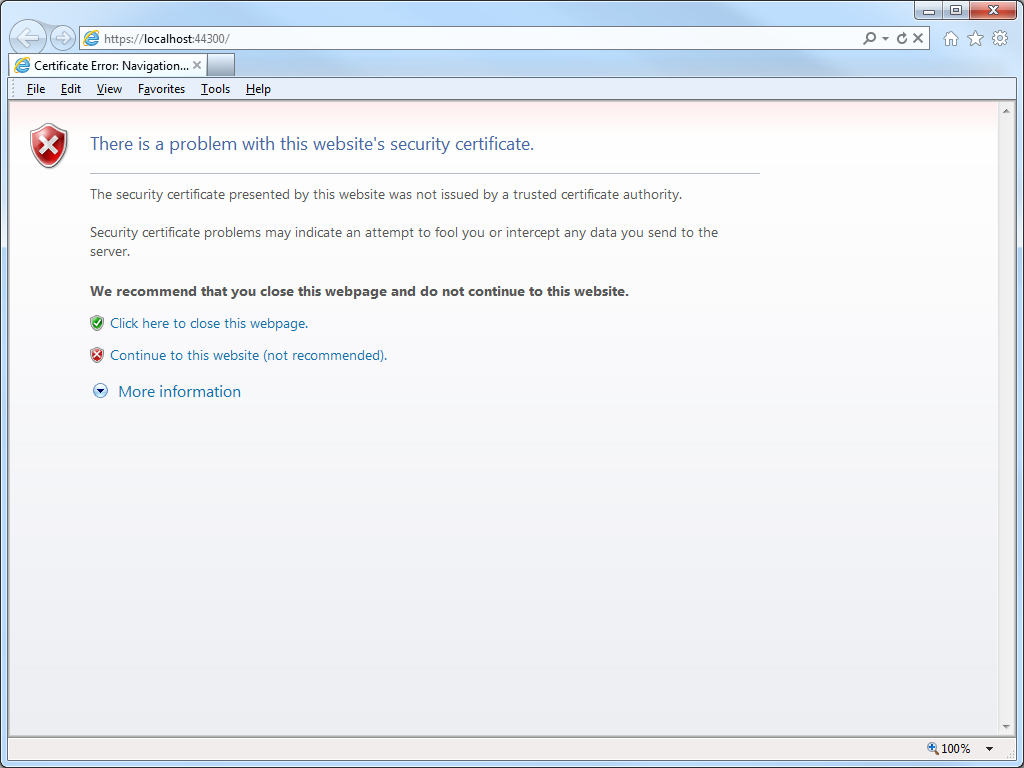
My coworker was using WebMatrix to create a website, although he could have been using Visual Studio and he would have run into the same problem. The problem he was seeing was that his application required HTTPS, but he was greeted with the following error message every time that he used Internet Explorer to browse to his development website at https://localhost:44300/:
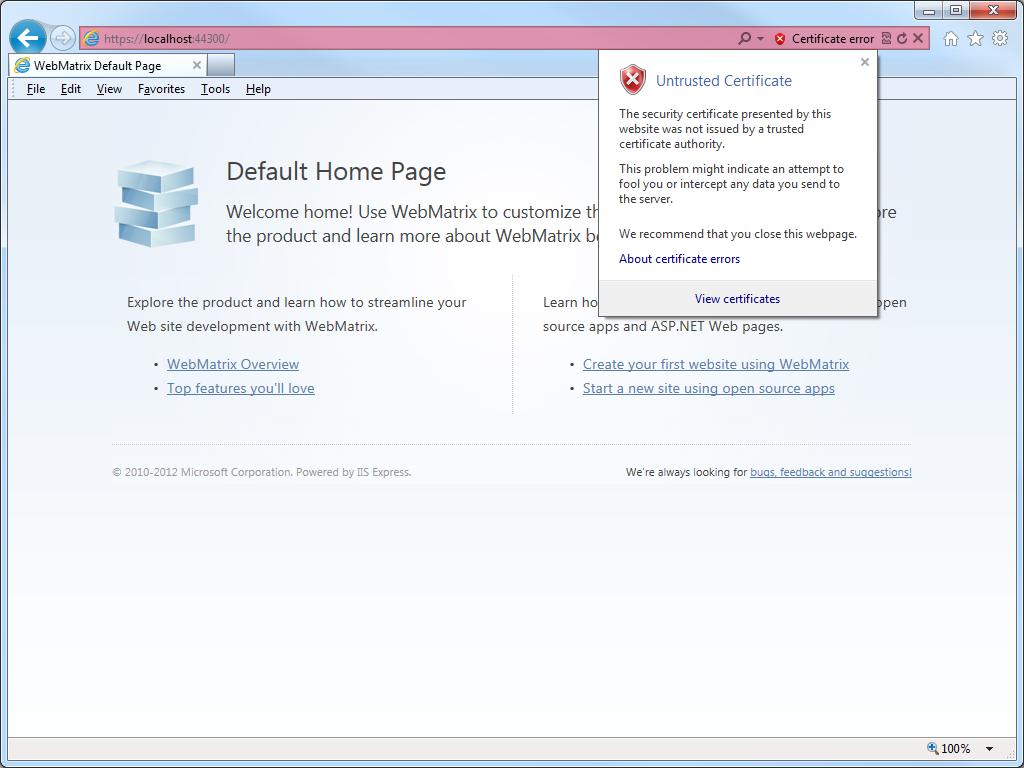
When he clicked the link to Continue to this website, he could click on Certificate error in the address bar, which would inform him that the website was using an Untrusted certificate:
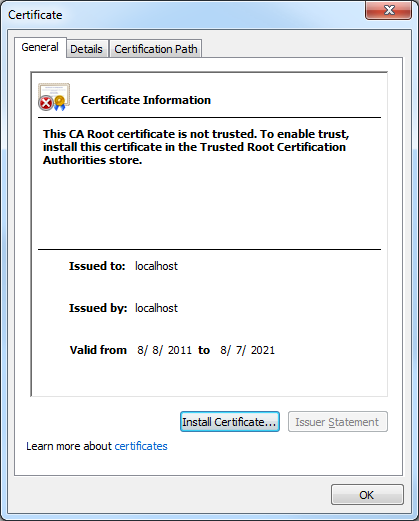
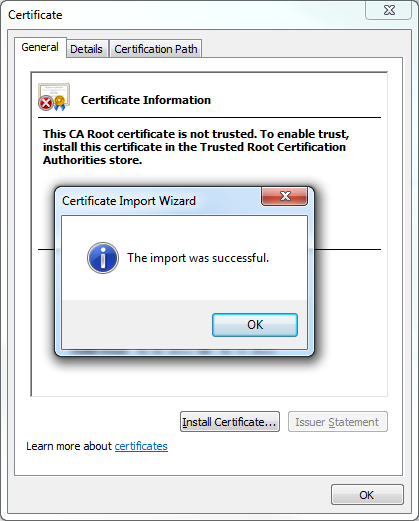
If he clicked View certificates, the Certificate dialog box informed him that the CA Root certificate was not trusted:
Cause
Since my coworker was using WebMatrix with IIS Express, which is the default development web server for WebMatrix and Visual Studio, all HTTPS communication was using the self-signed certificate from IIS Express. Since that certificate is self-signed, it is not trusted as if it was issued from a "Trusted Root Certification Authority," and therefore Internet Explorer (or any other security-conscious web browser) was doing the right thing by warning the end-user that they were using an untrusted certificate for HTTPS.
If you were seeing this error when browsing to an Internet website, this would be "A Very Bad Thing™", because you might be sending your confidential information to an untrusted website.
Resolutions
Fortunately this situation can be easily rectified, and there are two different approaches that you can use, and I will discuss both in the subsequent sections.
Resolution Number #1 - Configure your personal account to trust the IIS Express Certificate
The easiest solution is to configure your user account to trust the self-signed certificate as though it were issued by a trusted root certificate authority. To do so, use the following steps:
- Browse to https://localhost:44300/ (or whatever port IIS Express is using) using Internet Explorer and click Continue to this website:
- Click on Certificate error in the address bar, and then click View certificates:
- When the Certificate dialog box is displayed, click Install Certificate:
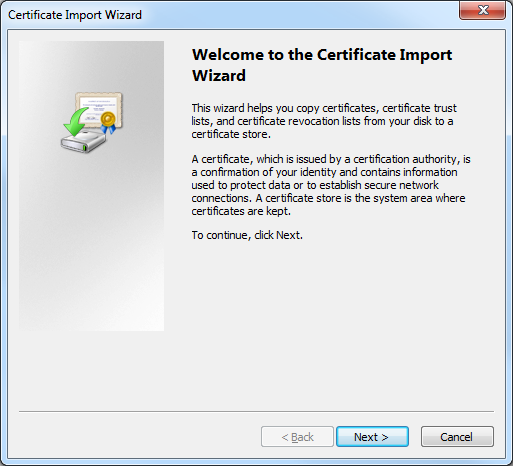
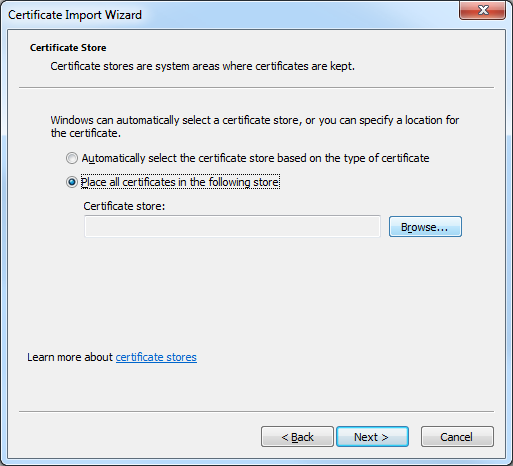
- When the Certificate Import Wizard is displayed, click Next:
- Click Place all certificates in the following store, and then click Browse:
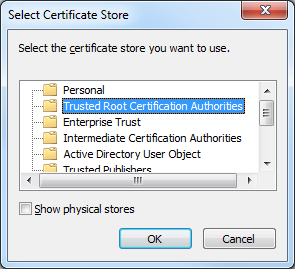
- When the Select Certificate Store dialog box is displayed, click Trusted Root Certification Authorities, and then click OK:
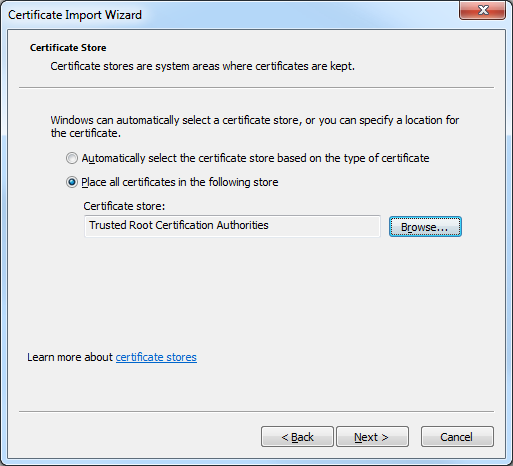
- On the Certificate Import Wizard, click Next:
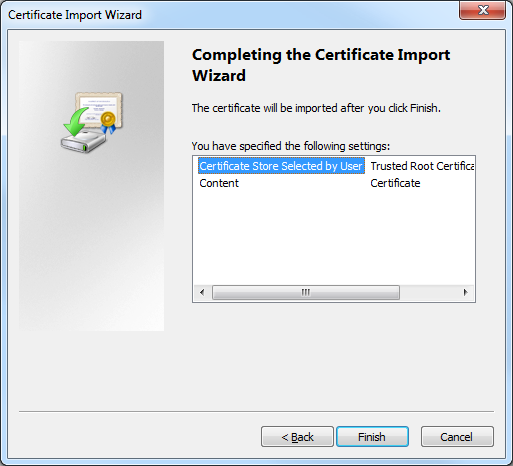
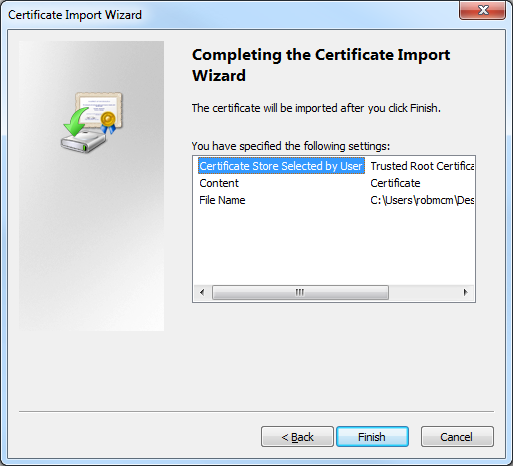
- When the Completing the Certificate Import Wizard page is displayed in the wizard, click Finish:
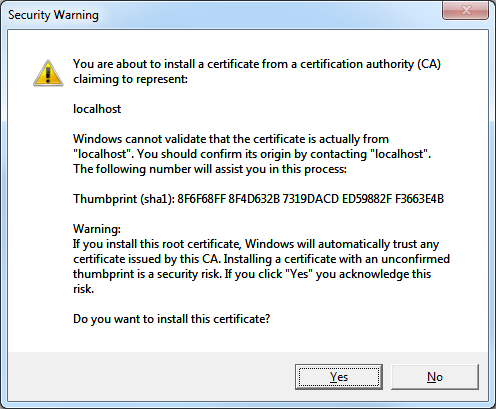
- When the Security Warning dialog box is displayed, click Yes to trust the certificate:
- Click OK when the Certificate Import Wizard informs you that the import was successful:
Resolution Number #2 - Configure your computer to trust the IIS Express Certificate
A more-detailed approach is to configure your computer system to trust the IIS Express certificate, and you might want to do this if your computer is shared by several developers who log in with their individual accounts. To configure your computer to trust the IIS Express certificate, use the following steps:
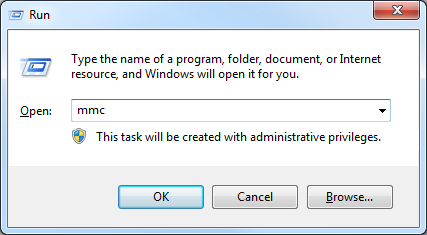
- Open a blank Microsoft Management Console by clicking Start, then Run, entering "mmc" and clicking OK:
Note: You can also open a blank Microsoft Management Console by typing "mmc" from a command prompt and pressing the Enter key. - Add a snap-in to manage certificates for the local computer:
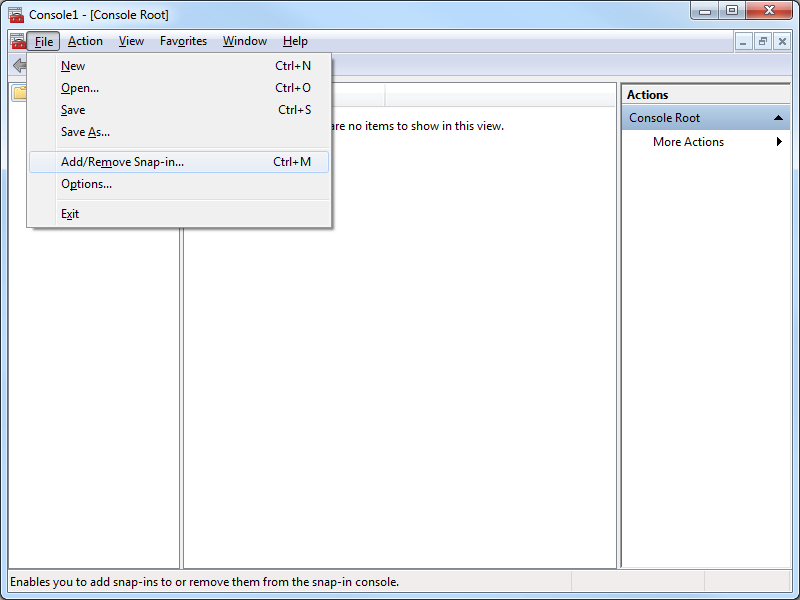
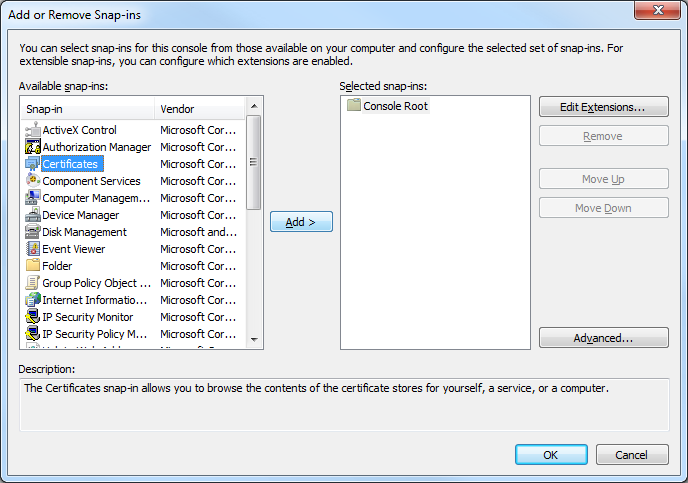
- Click File, and then click Add/Remove Snap-in:
- When the Add or Remove Snap-ins dialog box is displayed, click Certificates, and then click Add:
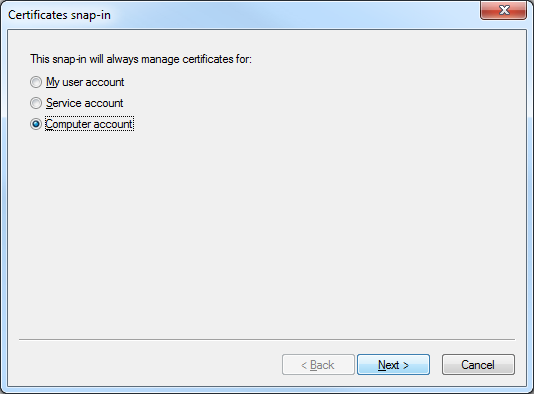
- When the Certificates Snap-ins dialog box is displayed, click Computer account, and then click Next:
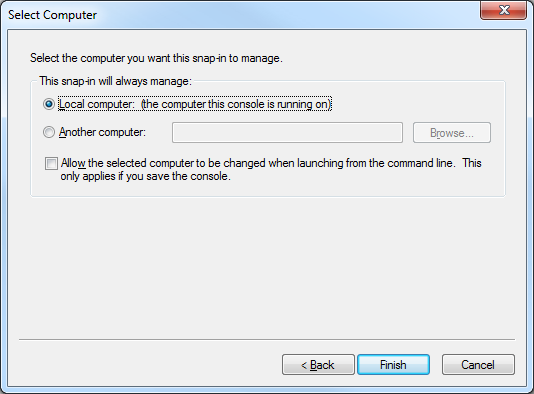
- Click Local computer, and then click Finish:
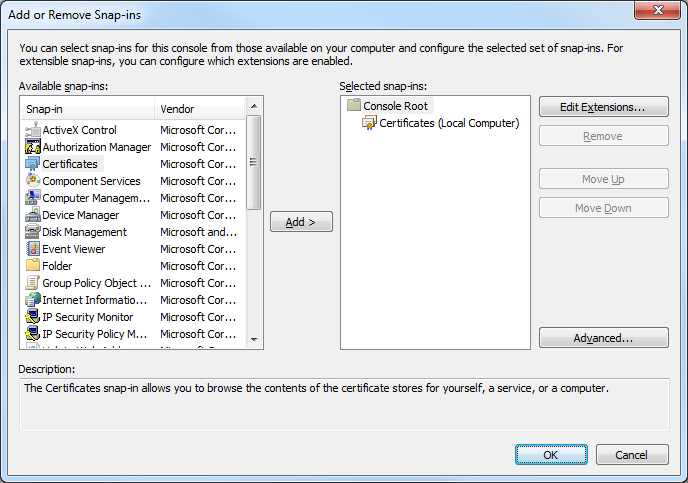
- Click OK to close the Add or Remove Snap-ins dialog box:
- Click File, and then click Add/Remove Snap-in:
- Export the IIS Express certificate from the computer's personal store:
- In the Console Root, expand Certificates (Local Computer), then expand Personal, and then click Certificates:
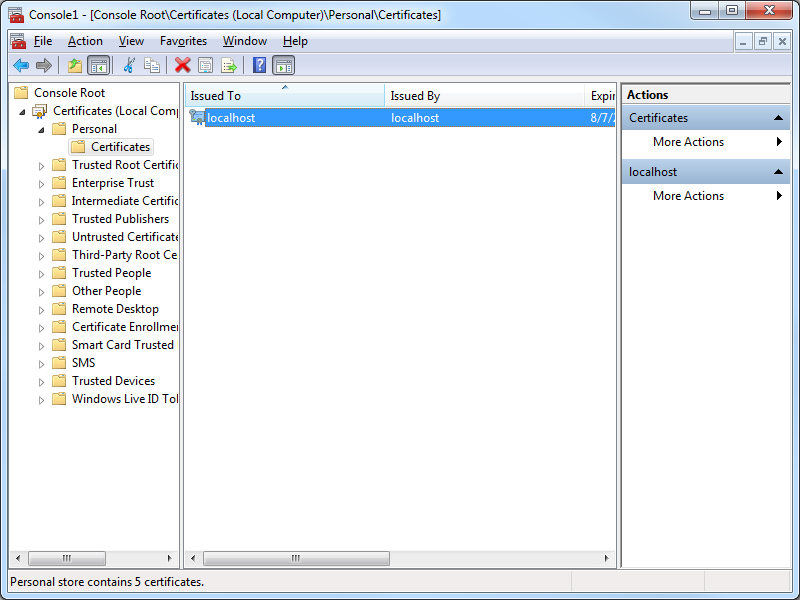
- Select the certificate with the following attributes:
- Issued to = "localhost"
- Issued by = "localhost"
- Friendly Name = "IIS Express Development Certificate"
- Click Action, then click All Tasks, and then click Export:

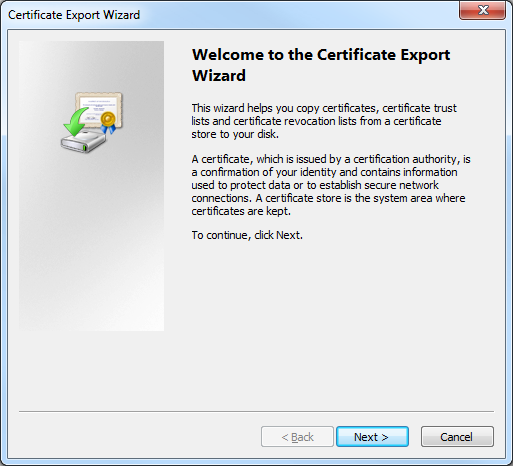
- When the Certificate Export Wizard is displayed, click Next:
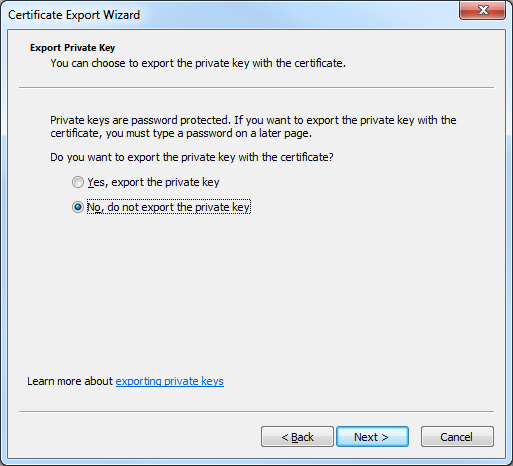
- Click No, do not export the private key, and then click Next:
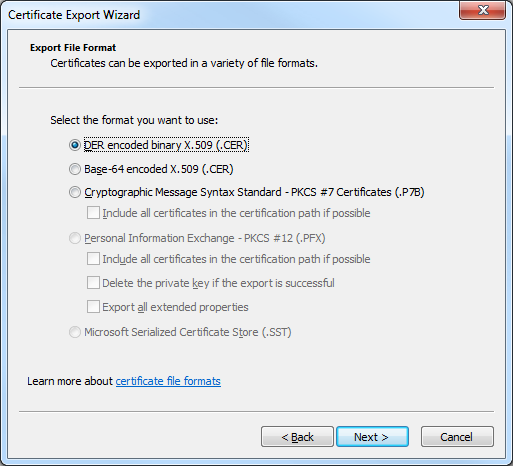
- Click DER encoded binary X.509 (.CER), and then click Next:
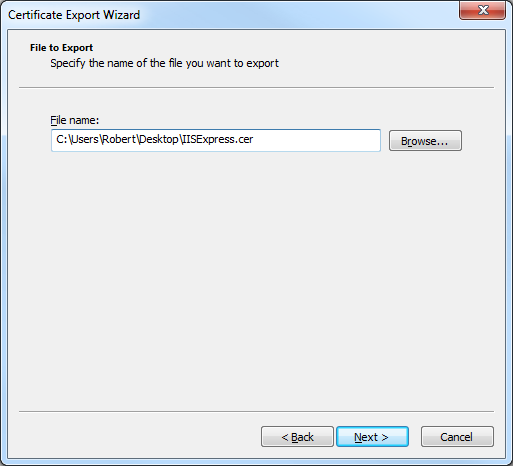
- Enter the path for exported certificate, e.g. "c:\users\robert\desktop\iisexpress.cer", and then click Next:
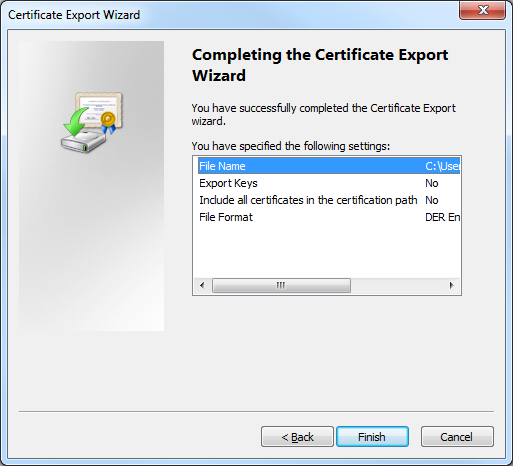
- Click Finish to export the certificate:
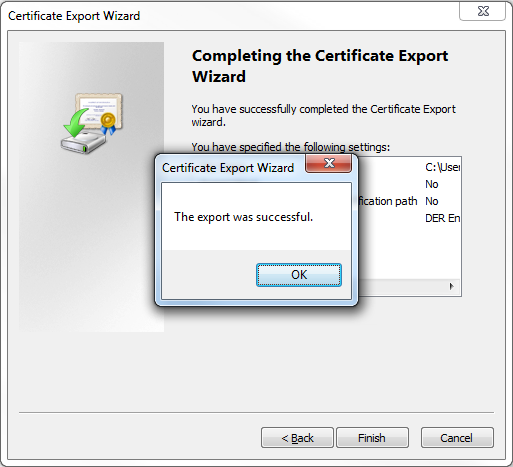
- Click OK when the Certificate Export Wizard displays a dialog box informing you that the export was successful:
- In the Console Root, expand Certificates (Local Computer), then expand Personal, and then click Certificates:
- Import the IIS Express certificate to the computer's Trusted Root Certification Authorities store:
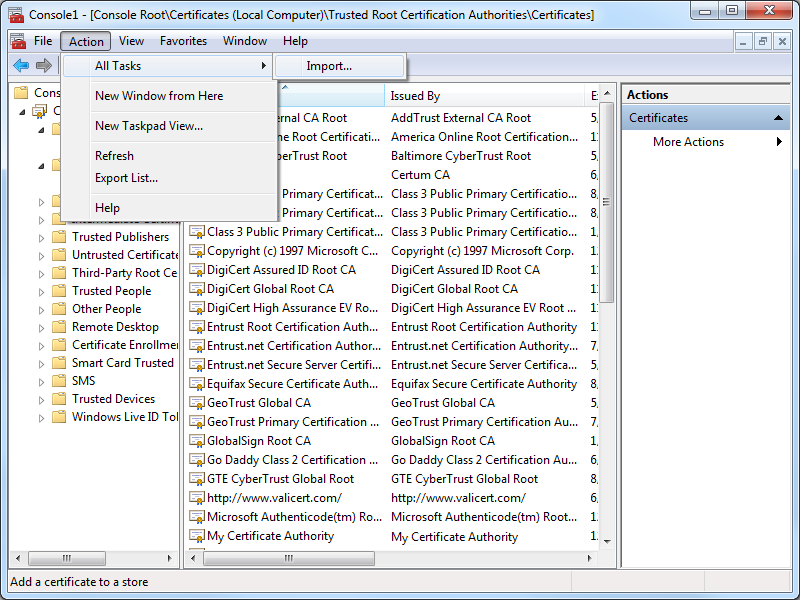
- In the Console Root, expand Certificates (Local Computer), then expand Trusted Root Certification Authorities, and then click Certificates:
- Click Action, then click All Tasks, and then click Import:
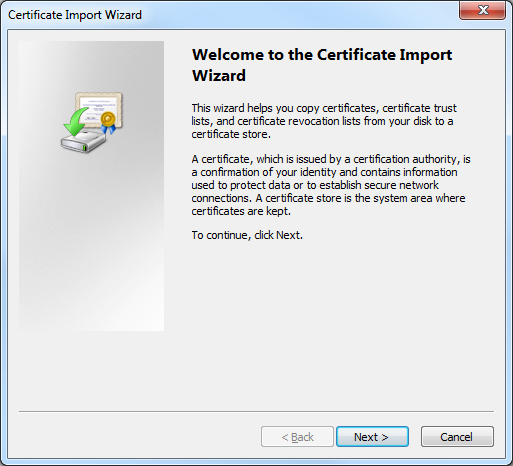
- When the Certificate Import Wizard is displayed, click Next:
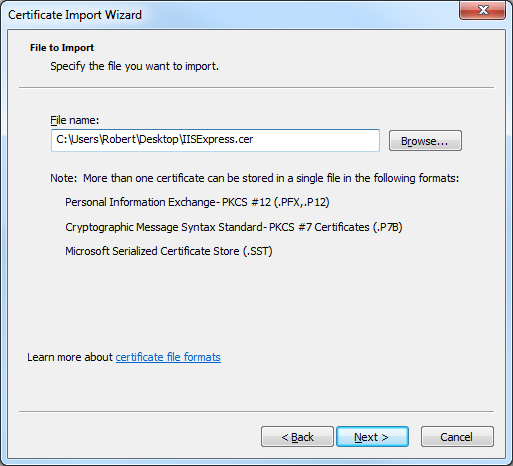
- Enter the path to your exported certificate, e.g. "c:\users\robert\desktop\iisexpress.cer", and then click Next:
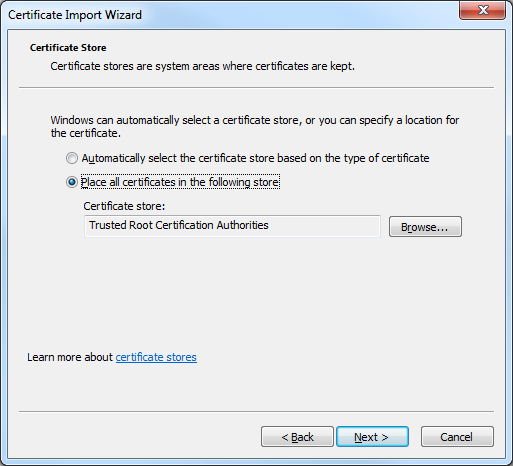
- Ensure that Place all certificates in the following store is checked and verify that the selected Certificate store is set to Trusted Root Certification Authorities, and then click click Next:
- Click Finish to import the certificate:
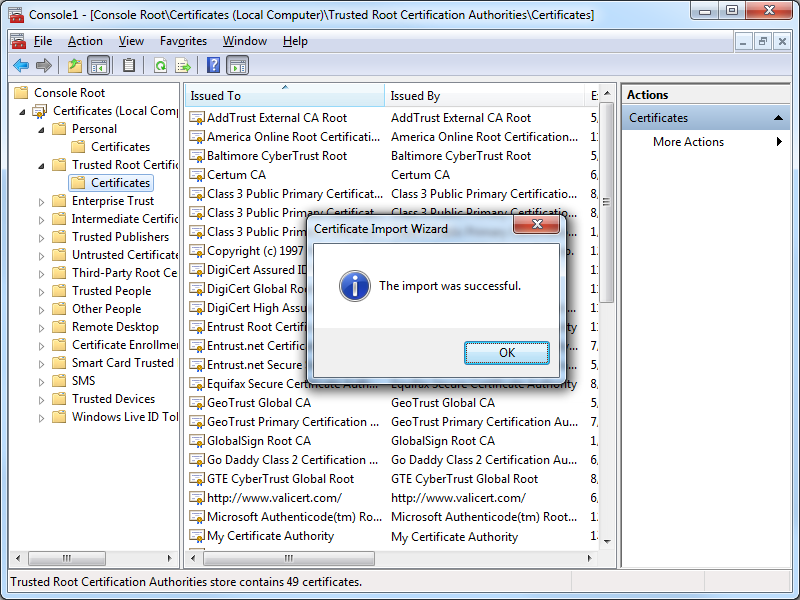
- Click OK when the Certificate Import Wizard displays a dialog box informing you that the import was successful:
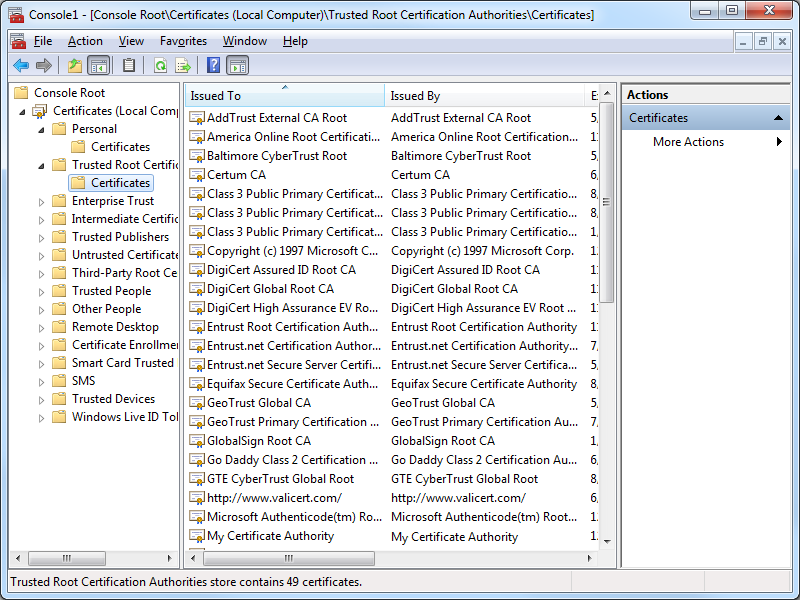
- You IIS Express certificate should now be displayed in the listed of Trusted Root Certification Authorities as "localhost":
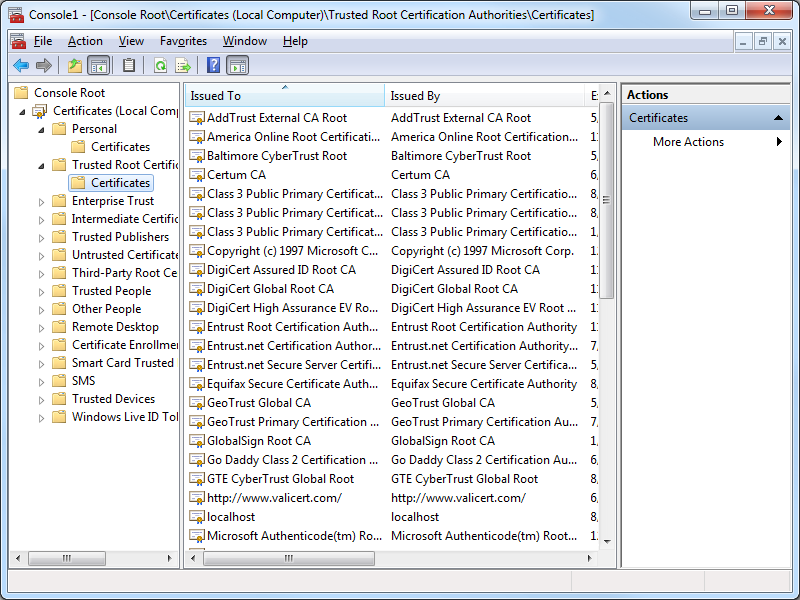
- In the Console Root, expand Certificates (Local Computer), then expand Trusted Root Certification Authorities, and then click Certificates:
Testing the Certificate Installation
Once you have completed all of the steps in one of the resolutions, you should use the following steps to test the installation of your IIS Express certificate as a trusted root certification authority:
- Close all instances of Internet Explorer that you have open.
- Re-open Internet Explorer, then browse to to https://localhost:44300/ (or whatever port IIS Express is using); your website should be displayed without prompting you to verify that you want to continue to the website.
- Click the Security Report icon in the address bar you should see that the website has been identified as localhost:
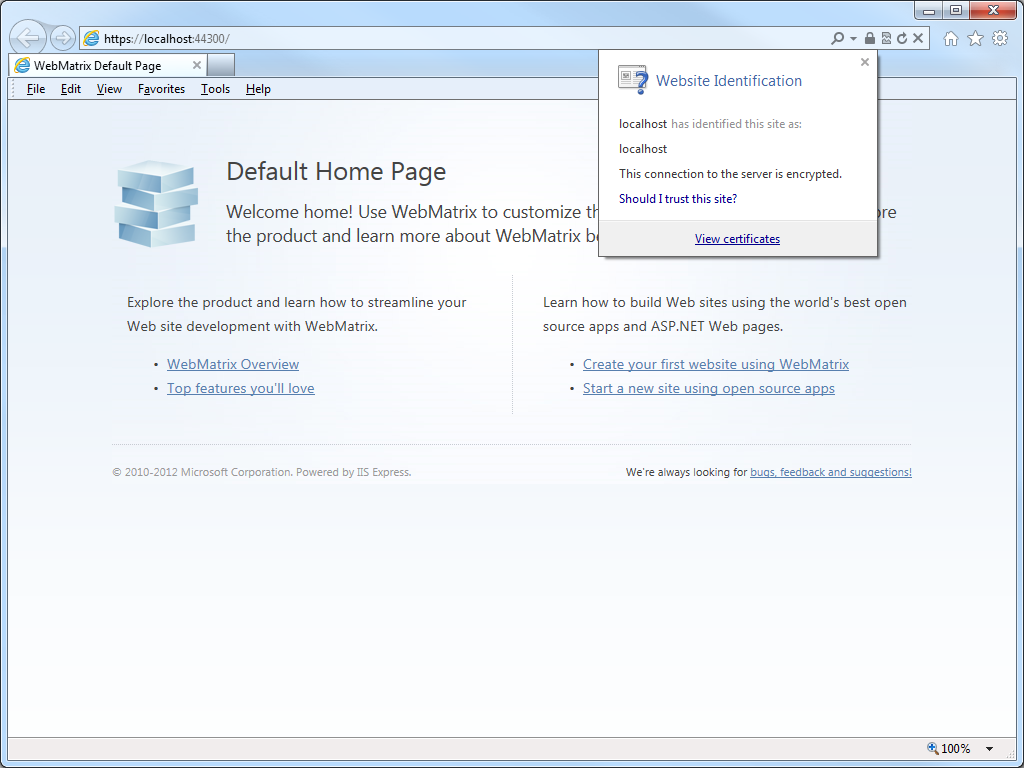
- If you click View certificates, you should now see that the certificate is trusted to ensure the identity of the computer:

In Closing...
This blog was a little longer than some of my past blogs, but it should provide you with the information you need to trust HTTPS-based websites that you are developing with IIS Express.
That wraps it up for today's blog post. ;-]
Note: This blog was originally posted at http://blogs.msdn.com/robert_mcmurray/
Custom Post-Build Events for Compiling FTP Providers
26 October 2013 • by Bob • Extensibility, FTP, Visual Studio
I've written a lot of walkthroughs and blog posts about creating custom FTP providers over the past several years, and I usually include instructions like the following example for adding a custom post-build event that will automatically register your extensibility provider in the Global Assembly Cache (GAC) on your development computer:
- Click Project, and then click the menu item your project's properties.
- Click the Build Events tab.
- Enter the following in the Post-build event command line dialog box:
net stop ftpsvc
call "%VS100COMNTOOLS%\vsvars32.bat">nul
gacutil.exe /if "$(TargetPath)"
net start ftpsvc
And I usually include instructions like the following example for determining the assembly information for your extensibility provider:
- In Windows Explorer, open your "C:\Windows\assembly" path, where C: is your operating system drive.
- Locate the FtpXmlAuthorization assembly.
- Right-click the assembly, and then click Properties.
- Copy the Culture value; for example: Neutral.
- Copy the Version number; for example: 1.0.0.0.
- Copy the Public Key Token value; for example: 426f62526f636b73.
- Click Cancel.
Over time I have changed the custom post-build event that I use when I am creating custom FTP providers, and my changes make it easier to register custom FTP providers. With that in mind, I thought that my changes would make a good blog subject.
First of all, if you take a look at my How to Use Managed Code (C#) to Create a Simple FTP Authentication Provider walkthrough, you will see that I include instructions like my earlier examples to create a custom post-build event and retrieve the assembly information for your extensibility provider.
That being said, instead of using the custom post-build event in that walkthrough, I have started using the following custom post-build event:
net stop ftpsvc
call "$(DevEnvDir)..\Tools\vsvars32.bat"
gacutil.exe /uf "$(TargetName)"
gacutil.exe /if "$(TargetPath)"
gacutil.exe /l "$(TargetName)"
net start ftpsvc
This script should resemble the following example when entered into Visual Studio:
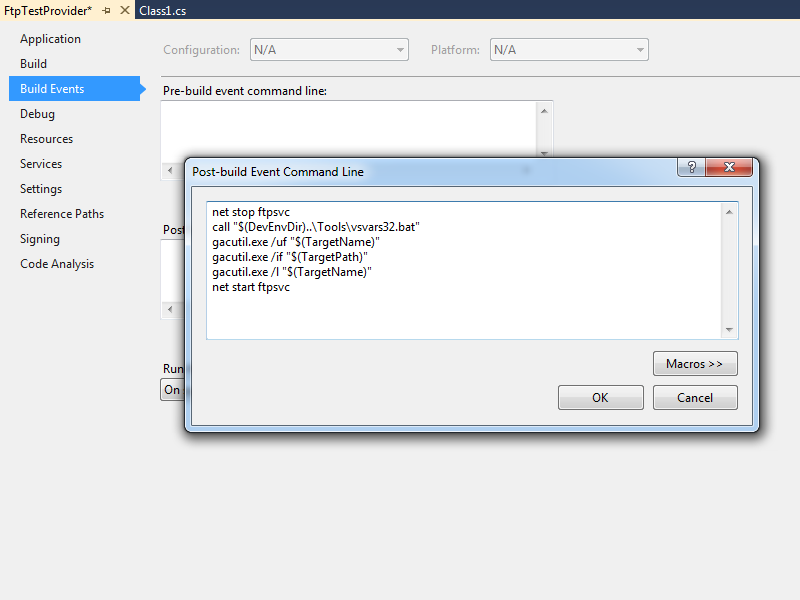
This updated script performs the following actions:
- Stops the FTP service (this will allow any copies of your DLL to unload)
- Loads the Visual Studio environment variables (this will add gacutil.exe to the path)
- Calls gacutil.exe to forcibly unregister any previous version of your FTP provider
- Calls gacutil.exe to forcibly register the newly-compiled version of your FTP provider
- Calls gacutil.exe to list the GAC information for your FTP provider (this will be used to register your DLL with IIS)
- Starts the FTP service
Let's say that you created a simple FTP authentication provider which contained code like the following example:
using System;
using System.Text;
using Microsoft.Web.FtpServer;

public class FtpTestProvider :
    BaseProvider,
    IFtpAuthenticationProvider
{
    private string _username = "test";
    private string _password = "password";

    public bool AuthenticateUser(
        string sessionId,
        string siteName,
        string userName,
        string userPassword,
        out string canonicalUserName)
    {
        canonicalUserName = userName;
        if (((userName.Equals(_username,
            StringComparison.OrdinalIgnoreCase)) == true) &&
            userPassword == _password)
        {
            return true;
        }
        else
        {
            return false;
        }
    }
}
When you compile your provider in Visual Studio, the output window should show the results of the custom post-build event:
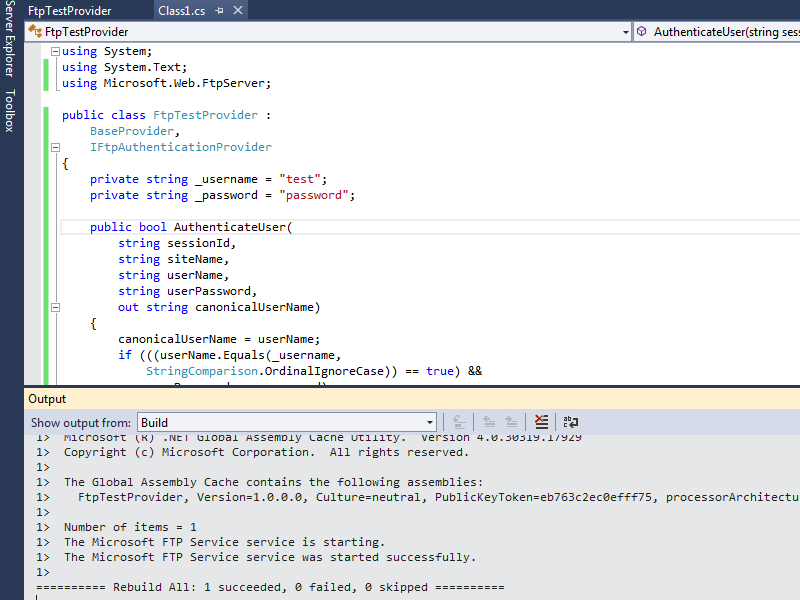
When you examine the output information in detail, the highlighted area in the example below should be of particular interest, because it contains the assembly information for your extensibility provider:
------ Rebuild All started: Project: FtpTestProvider, Configuration: Debug Any CPU ------
FtpTestProvider -> c:\users\foobar\documents\visual studio 2012\Projects\FtpTestProvider\bin\Debug\FtpTestProvider.dll
The Microsoft FTP Service service is stopping..
The Microsoft FTP Service service was stopped successfully.

Microsoft (R) .NET Global Assembly Cache Utility. Version 4.0.30319.17929
Copyright (c) Microsoft Corporation. All rights reserved.

Assembly successfully added to the cache
Microsoft (R) .NET Global Assembly Cache Utility. Version 4.0.30319.17929
Copyright (c) Microsoft Corporation. All rights reserved.

The Global Assembly Cache contains the following assemblies:
FtpTestProvider, Version=1.0.0.0, Culture=neutral, PublicKeyToken=eb763c2ec0efff75, processorArchitecture=MSIL

Number of items = 1
The Microsoft FTP Service service is starting.
The Microsoft FTP Service service was started successfully.

========== Rebuild All: 1 succeeded, 0 failed, 0 skipped ==========
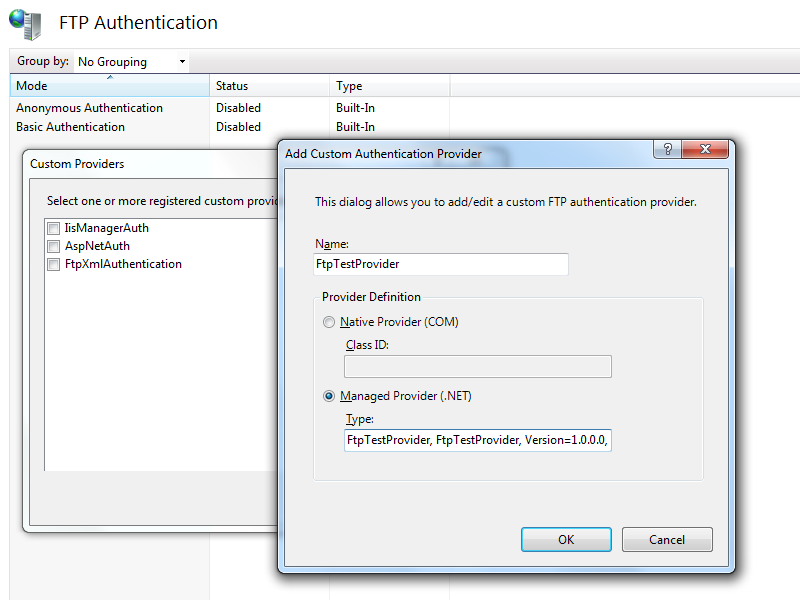
Once you have that information, you simply need to reformat it as "FtpTestProvider, FtpTestProvider, Version=1.0.0.0, Culture=neutral, PublicKeyToken=eb763c2ec0efff75" in order to enter it into the FTP Custom Authentication Providers dialog box in the IIS Manager, or by following the steps in my FTP Walkthroughs or my Adding Custom FTP Providers with the IIS Configuration Editor blogs.
That wraps it up for today's post. As always, let me know if you have any questions. ;-]
Note: This blog was originally posted at http://blogs.msdn.com/robert_mcmurray/